Migrate provides ways to help you understanding your rule set, and how it has applied to your document. Understanding the current state will help you to move forward with the refinement of your rule set.
Overview #
When you open the rules editor on a particular document, you are presented with quite a bit of information that is intended to help you when you want to update rules and create new rules. This includes:
- What rules have fired on this element?
- What annotation have been applied to this element?
- Where has this rule fired?
- What are the properties of this element?
To work effectively with the rules editor, you need to know how to get answers to the above questions. This will help you to understand your document’s structure and the existing rule set. You will then be ready to modify rules as needed. Everything you need to know is presented in the:
- content panel,
- element properties tab,
- and rules grid
Content Panel and Content Elements #
The Migrate rules editor displays a rendition of your document in the content panel. This is intended to look similar to your source document, but won’t be an exact match as it is an HTML rendition of the document that is specifically suited for Migrate. Sufficient formatting is retained, however, so that the content looks familiar to you. If the document is large, Migrate may actually split the document into chunks. In fact, you can control the chunking behaviour yourself.
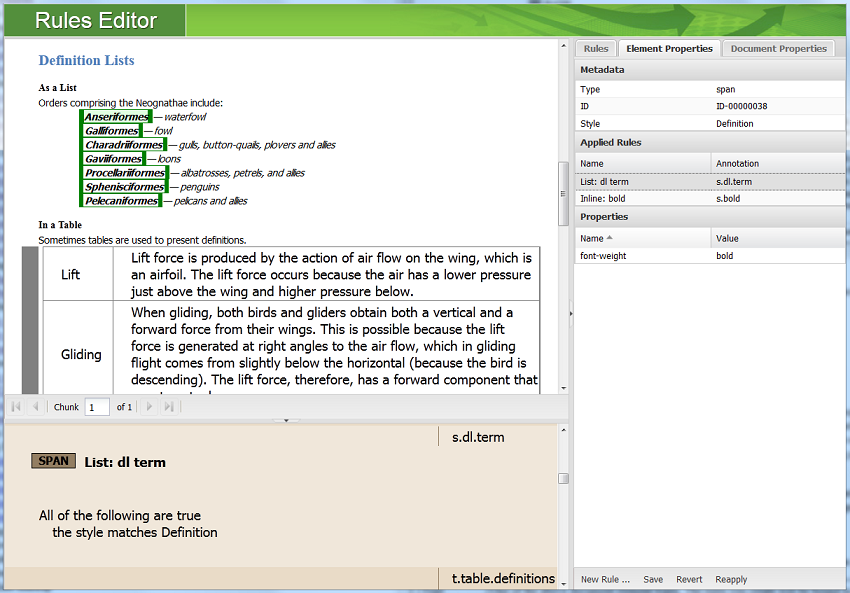
If you click around in the content panel, you will see that Migrate provides information associated with text you have selected in the Element Properties tab. The information displayed in the Element Properties tab stays synchronized with the selection in the content panel.

Migrate decomposes your document into content elements. Only the following short list of content element types are available:
- paragraph
- span
- image
- table
- row
- title
Some content elements can be nested inside others. For example, a span is contained in a paragraph. If you click on a nested content element, you will see its properties. To change your selection to the containing content element, simply click on the highlighted selection again. Each click will cause the selection to grow to the containing element. Once the outermost selection is current, the next click will cycle back to the innermost element at the point where you click. For example, if you repeatedly click on a span which is inside a table, the current selection will change from the span, to the containing paragraph, to the containing row, to the containing table. This is how you can select a table to see all of the information Migrate has about it.
The grey bars in the left margin indicate that no rules have been applied to the content element. This is often not a problem, as Migrate will map simple paragraphs to paragraphs, and tables to tables. But if the corresponding element is to have special semantic significance, you will likely need to ensure a rule applies to it.
Element Properties Tab #
The Element Properties tab provides the following information on the current content selection in the content panel:
| Type | One of the above content element types. The rules you create will be bound to a content element type. So you will create rules for paragraphs, different rules for spans, etc. |
| ID | The element ID as generated by Migrate. You almost never need to know this value, but in very special cases, you can force a rule to apply just to a specific element by testing for this ID. |
| Style | The styling of the content as carried over from your source document. |
| Annotations | A list of the annotations which have been applied to the selected content element are shown. |
| Applied Rules | A list of the rules whose conditions caused it to match the selected content. The corresponding set of annotations that are therefore applied to the content are also shown. |
| Properties | various details that Migrate was able to extract from the source document |
| Conditions | Specifies the conditions which were applied to the selected content in the authoring environment. |
| Contexts | Specifies the context which has been applied to the selected content by a set-context() annotation in one of the rules in your list of rules. |
Rules Grid #
The rules grid provides a condensed display of your rule set.

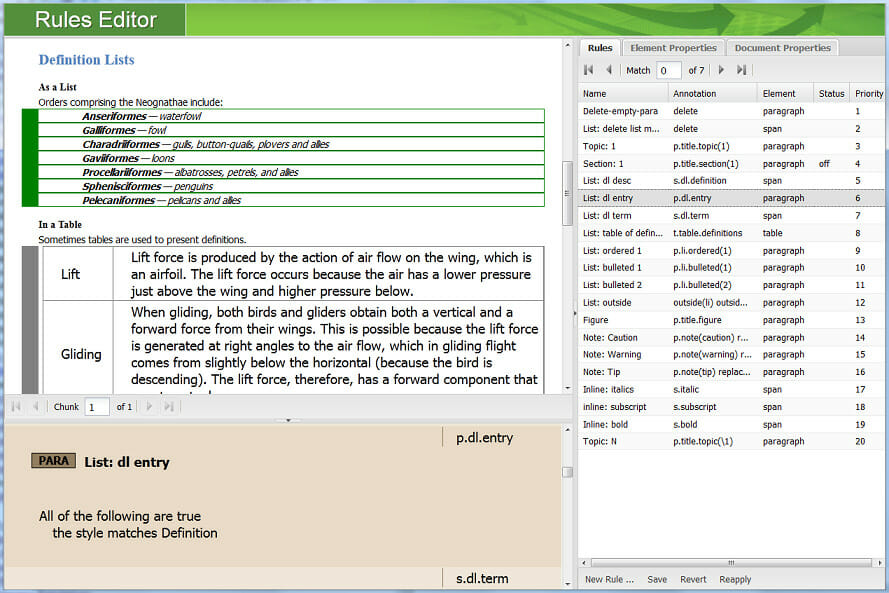
As with the Element Properties tab, the rules grid also stays synchronized with the content panel. As you select different rules in the grid, the content element in the content panel for which the rule has has matched will be highlighed with a green border. The Rules Grid provides a toolbar for stepping through these matches. This allows you to quickly see where the in the content the selected rule has applied.
The rules grid is also synchronized with the displayed rules view. As you change your selection in the rules grid, the displayed rules view will automatically scroll to show you the rule’s full definition.


